
Using the Panelbox Macro
-
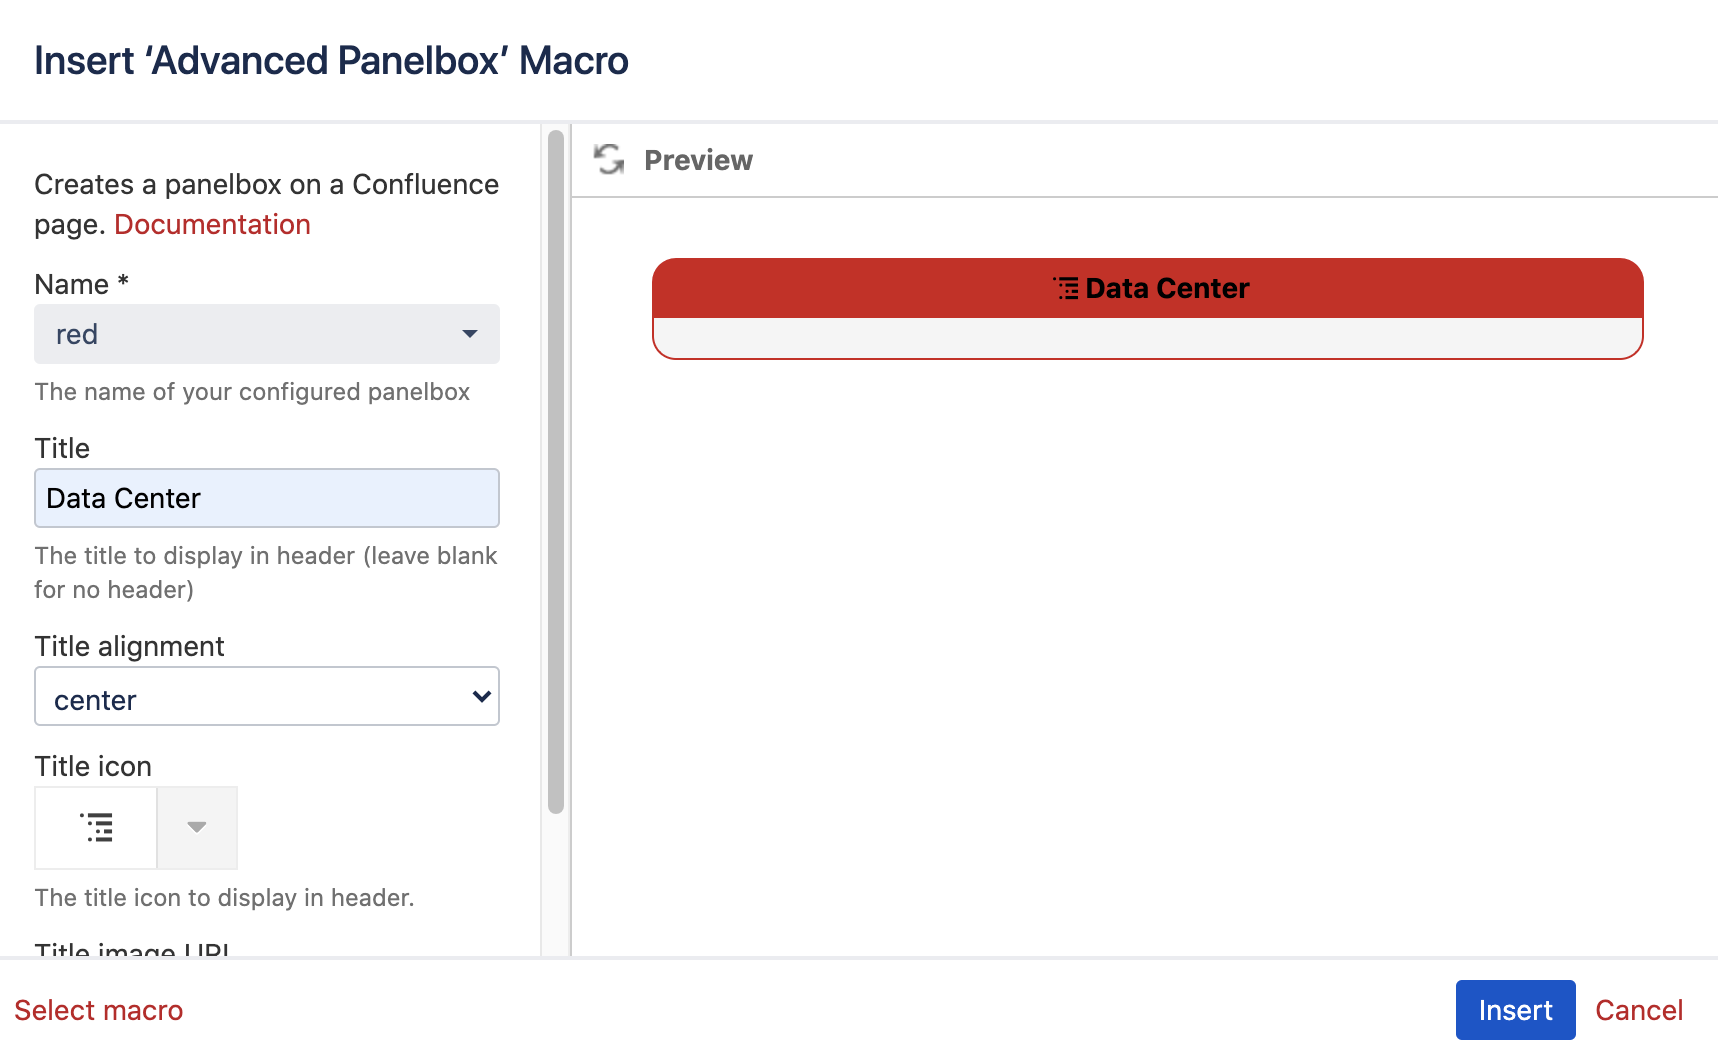
In the editor, type "{panelbox" and choose "Advanced Panelbox".
-
In the overlay, select a predefined Panelbox in the dropdown (for example: "red").
-
You may give the panel a title and decide on its alignment. You may also select a title icon or insert an image URL.
-
If you like the preview of the Panelbox, click "Insert".
-
Back in the editor, fill the Panelbox with content.
-
Publish/update the page when you are done.
-
The Panelbox "red" is now part of your page.
Configuring Advanced Panelboxes
In the configuration of the Advanceded Panelboxes (in the Administration Console) you can configure the Panelboxes:
-
In the app management section, select "Advanced Panelboxes for Confluence" and click on "Configure":

-
You will now see a list of your individual Panelboxes.
Configuring an existing Panelbox
-
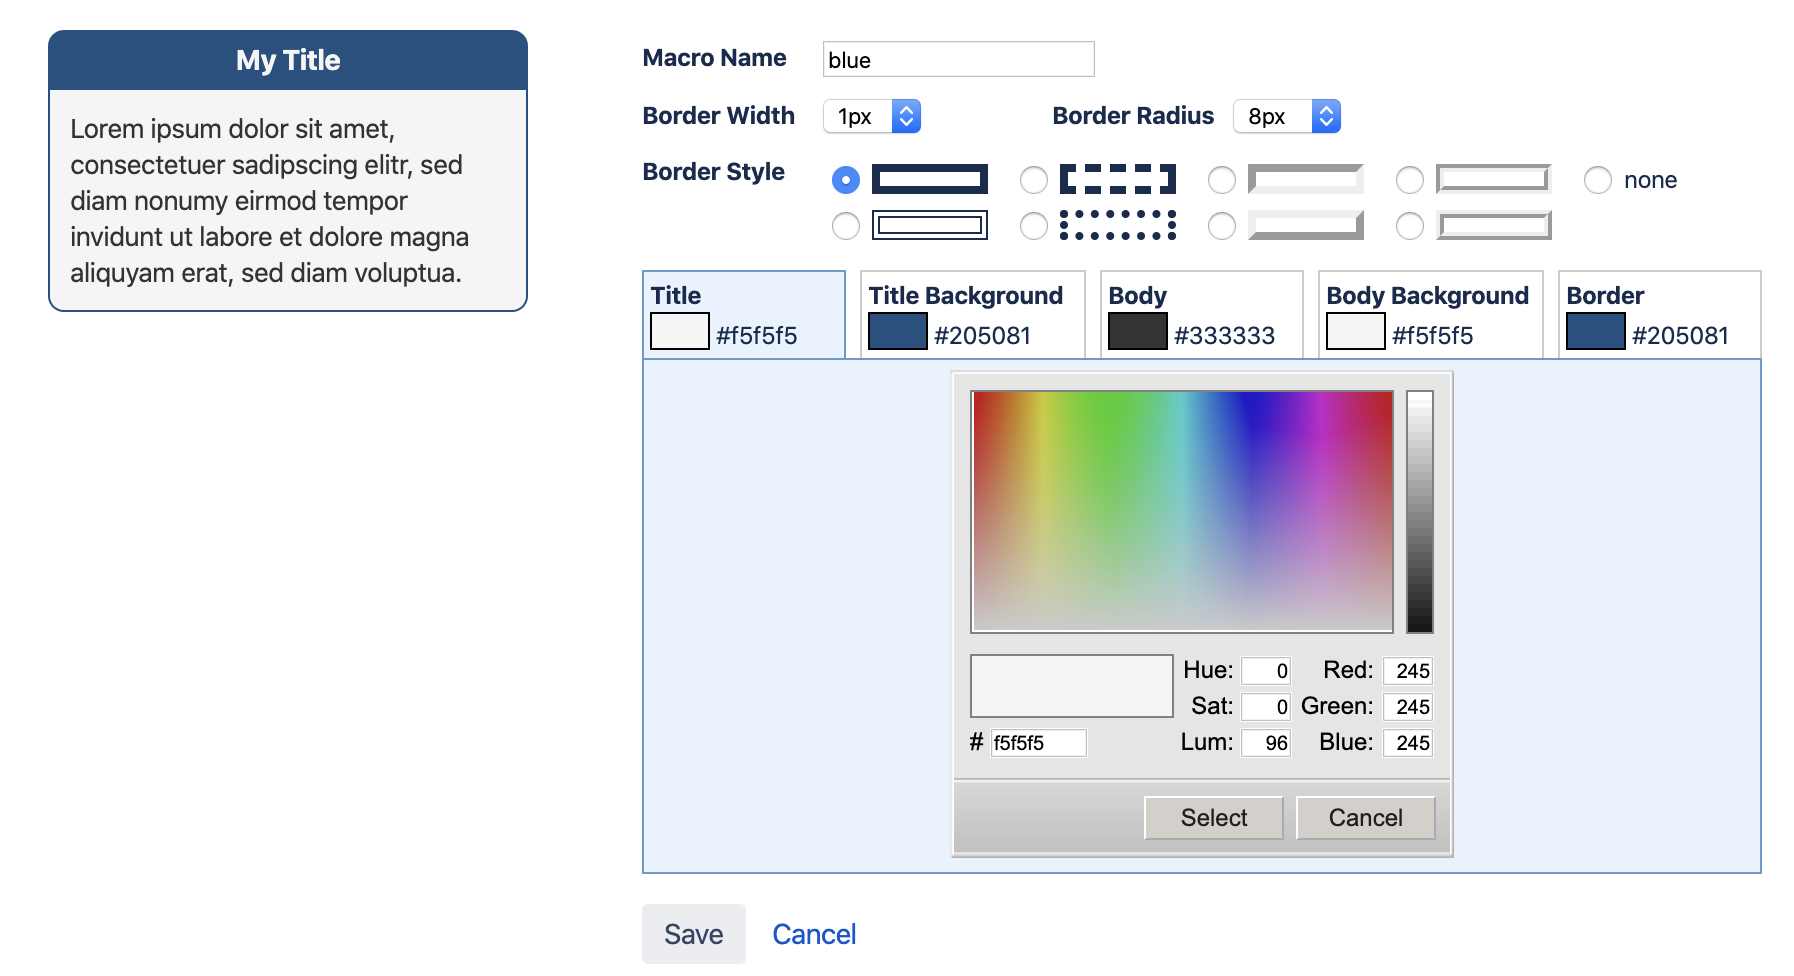
Click on the "Edit" link on the right side of the Panelbox you want to edit:

-
Change any settings you like, then click the "Save" button.
-
The new settings will now be applied to all Panelboxes with the name "blue". No need to edit dozens of pages once a setting changes!
Adding a new Panelbox
-
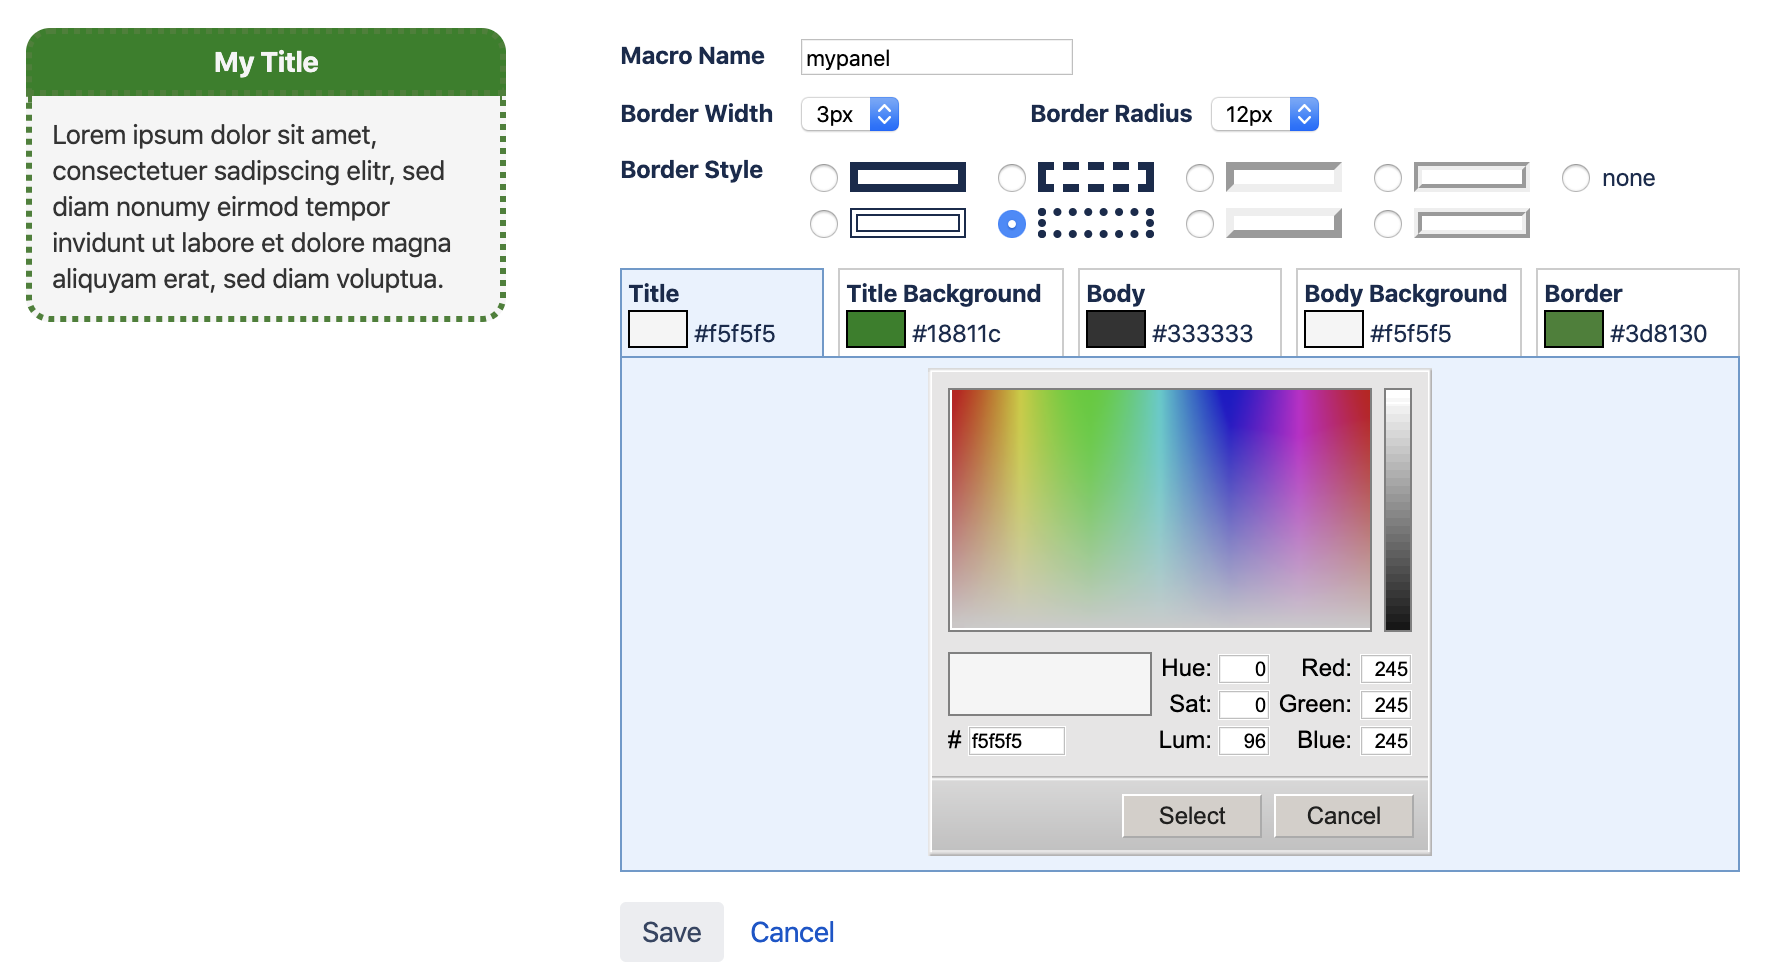
To create a new Panelbox, click on "+ Add Panelbox".

-
Scroll down the list until the last entry. This is your new Panelbox. Edit the Panelbox, assign it a new name and new properties.

-
When you are happy with the preview, click the "Save" button.
-
Your new Panelbox may now be used anywhere on your Confluence.