
Step 1: Create a SonarQube™ server configuration
Add a SonarQube™ server configuration in the app under Bitbucket Admin → Include Code Quality.
-
Configure a name for the server.
-
Add https://sonarcloud.io as your SonarQube™ Application URL.
-
Add your SonarCloud™ organization key
.png?cb=9e17f387fc7becc44f5ab89e34df454e)
-
Add a User Token of the SonarQube™ Service Account.
-
Choose if you want to enable authentication with personal SonarQube™ accounts instead of a Service User.
-
Using personal accounts can be useful to track user actions like resolving an issue or marking it as a false positive and easily identify who performed which action.
-
-
Choose between an automatic webhook configuration or a manual webhook configuration if you tick the corresponding checkbox.
-
You may only use an automatic webhook if the User Token used has Administer System permissions. You can read more on webhook configuration here.
-
Step 2: Configure a SonarQube™ Analysis
Next step is to configure your SonarQube™ scan in your build system.
Go to the dedicated documentation page for more details on how to configure your SonarQube™ Analysis.
Once you have configured a SonarQube™ Analysis, run it to make sure the results are visible in SonarQube™.
For multiple SonarQube™ projects for the same repository: ensure the analysis results are available on each project in SonarQube™.
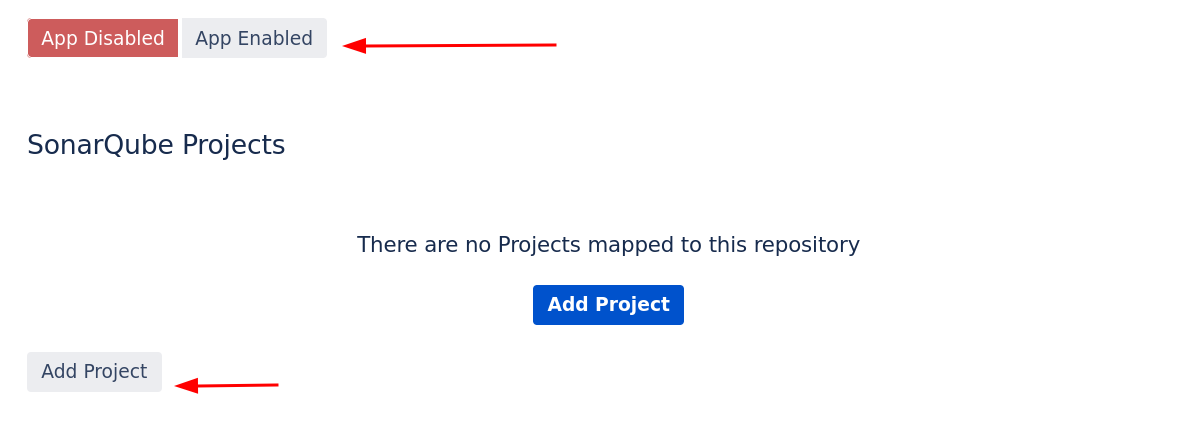
Step 3: Connect one or more SonarQube™ projects to a Repository
In Bitbucket, connect one or more SonarQube™ project to a Repository (Repository → Settings → Include Code Quality)
-
Click App Enabled, followed by Add Project.
-
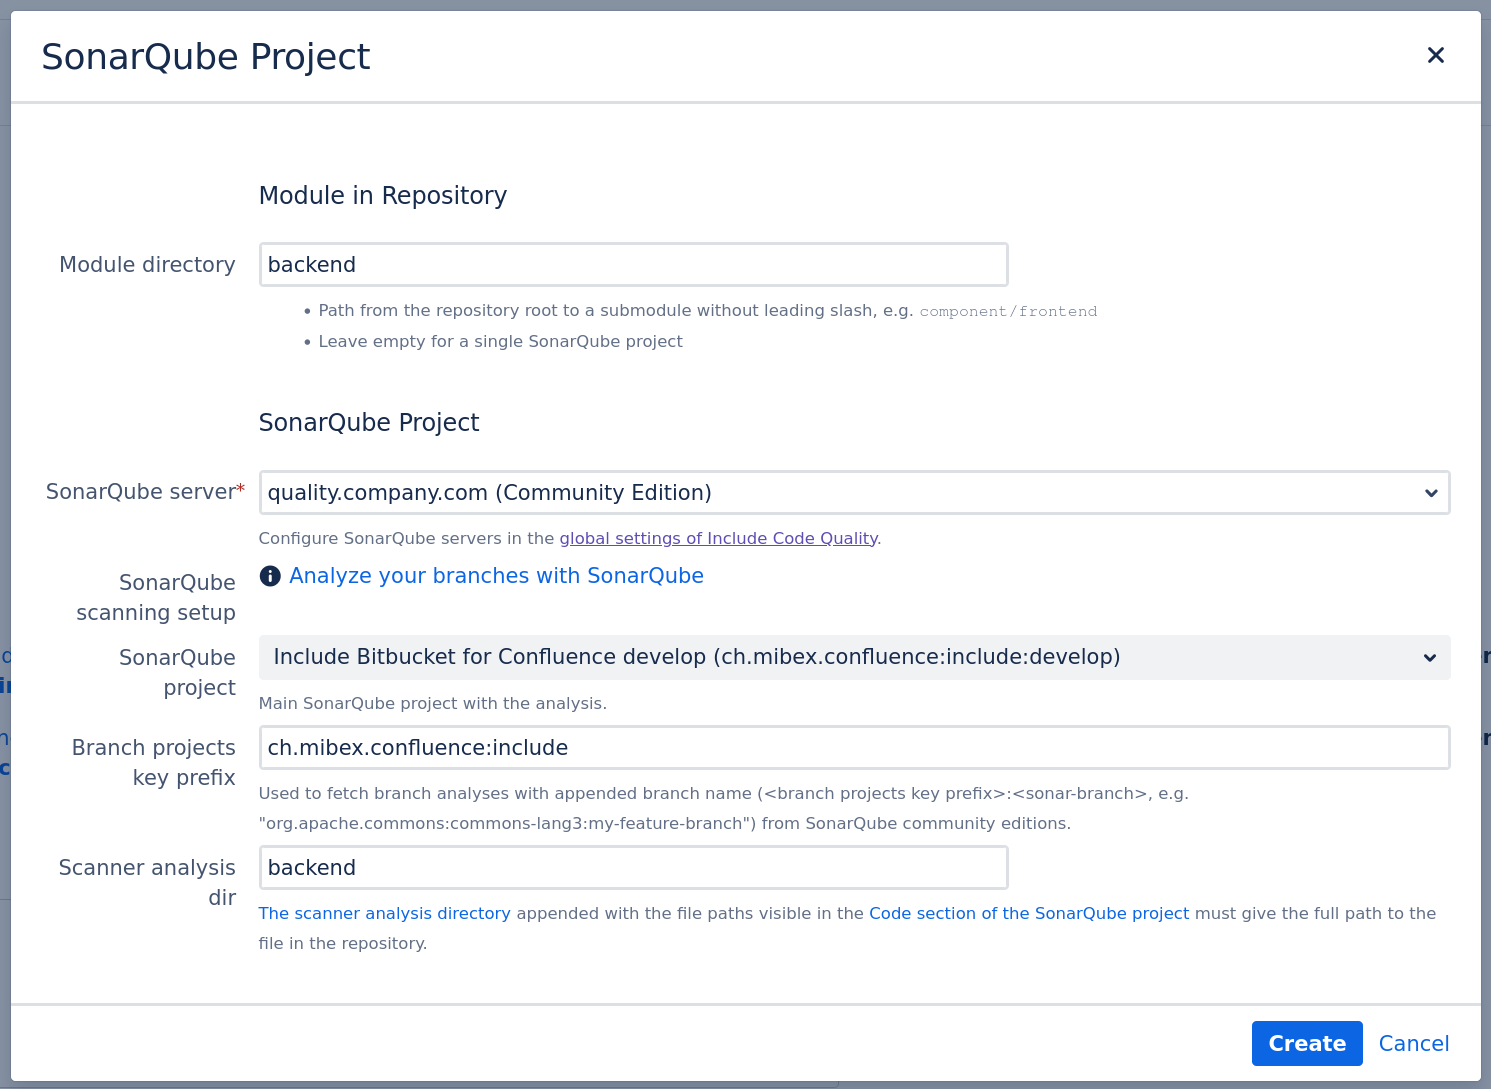
Select the Module Directory of the project. Leave empty for a single SonarQube™ project in the repository. Select a subfolder of the repository if you want to configure multiple SonarQube™ projects for the same repository (for example if you are working with a monorepo strategy).
-
Select the appropriate SonarQube™ server and SonarQube™ project.
-
Configure the Scanner analysis directory to the path where the analysis runs. The path must start with the module directory.
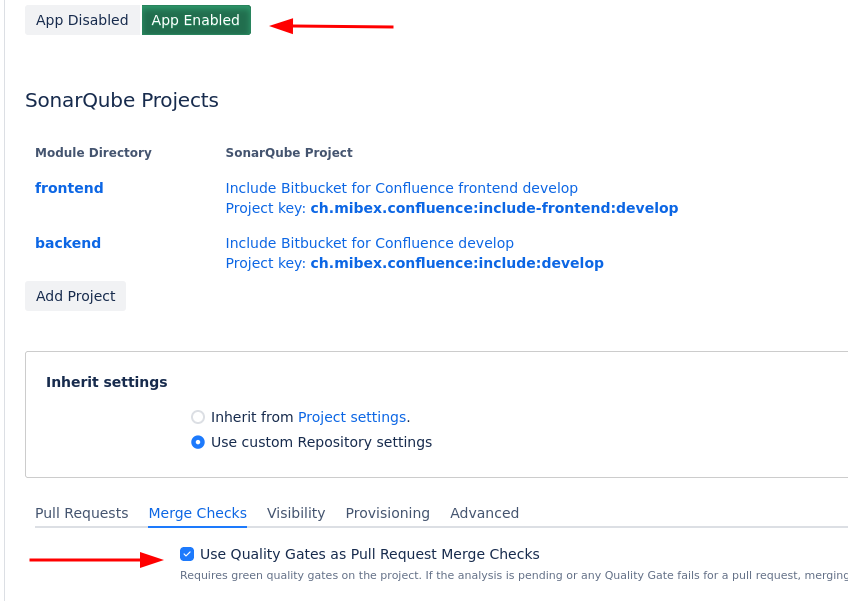
Step 4: Enable Include Code Quality for Bitbucket within your repository
In Bitbucket, Enable Include Code Quality for Bitbucket in the settings page of your repository (Repository → Settings → Include Code Quality)
-
Verify you have one or more SonarQube™ projects linked to the repository.
-
Toggle the App Enabled button.
-
Optional: Configure additional settings in the tabs if required.
-
☑ Use Quality Gates as Pull Request Merge Checks.
-
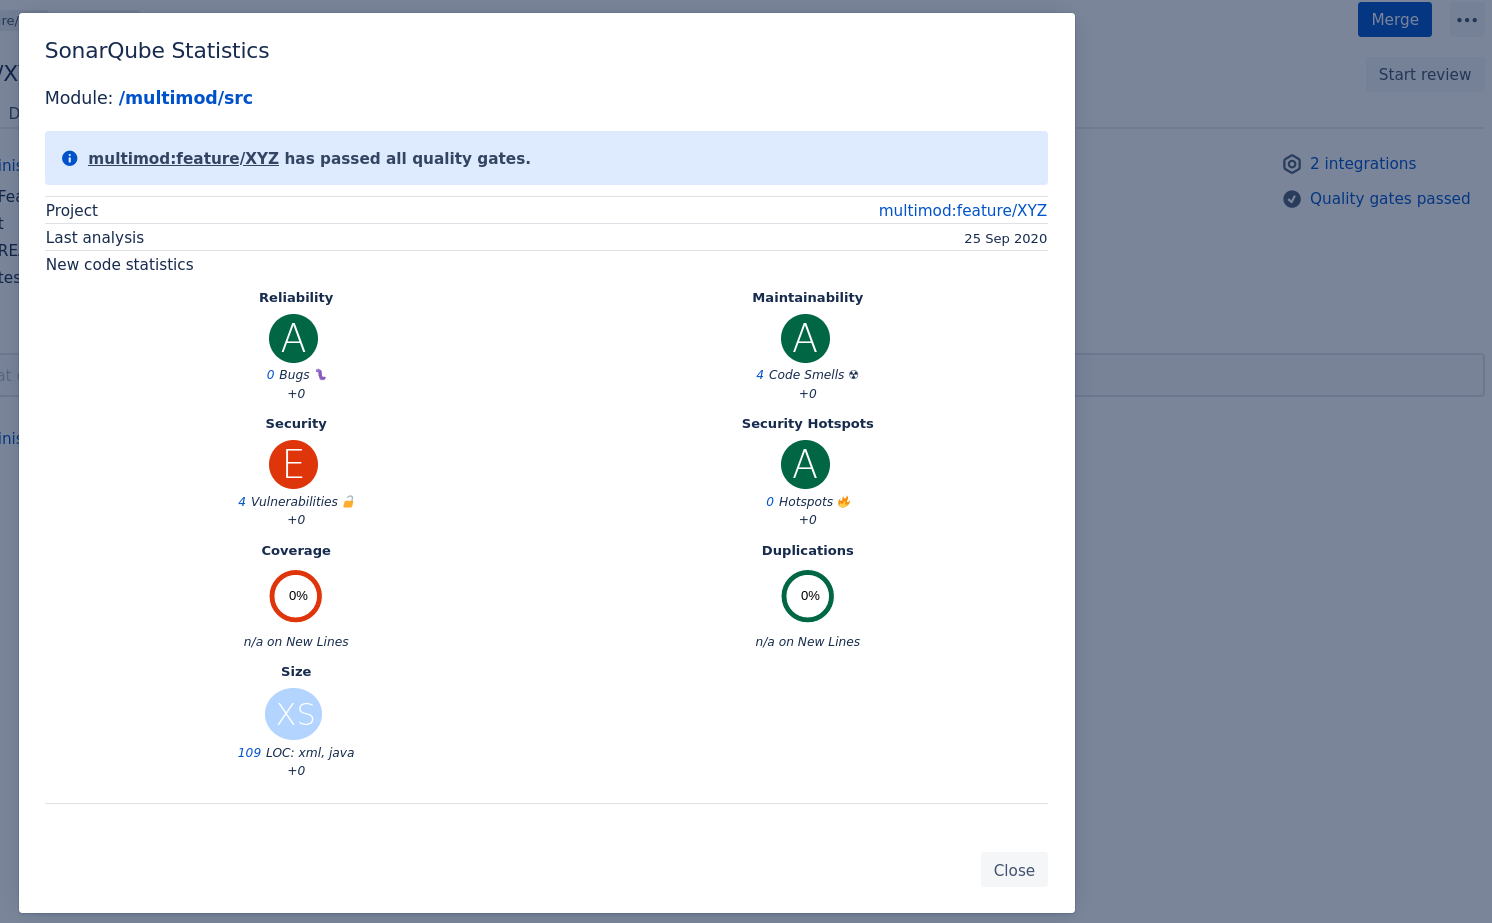
Step 5: Check if the SonarQube™ analysis is included in the main branch
In Bitbucket, go to Repository → Source View of the already analyzed main branch. You should see the issue annotations:
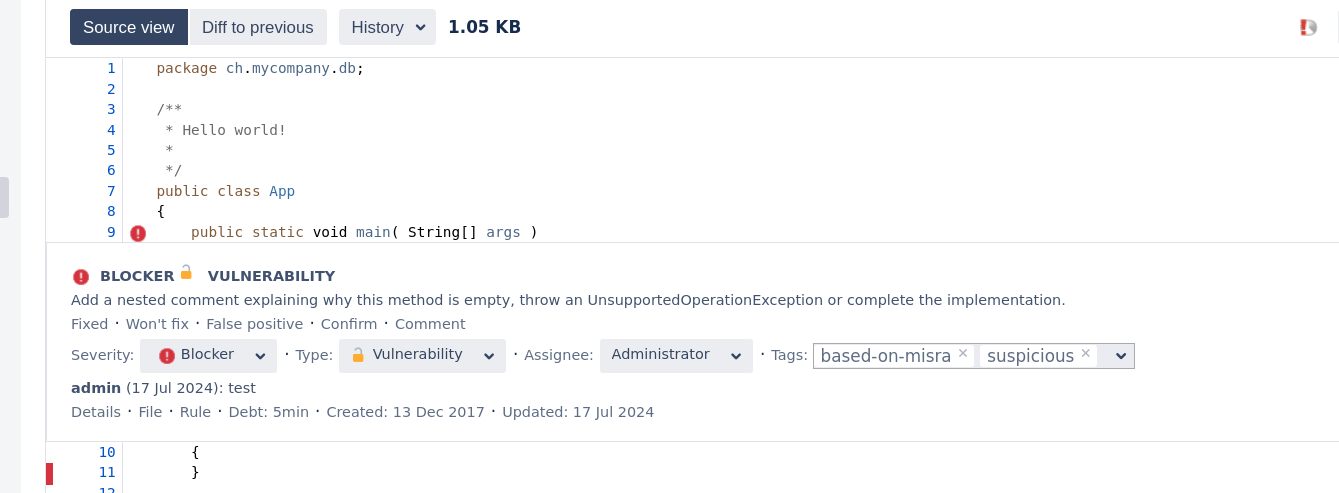
If you cannot see SonarQube™ issues or test coverage in here, please follow our configuration checklist to find out what went wrong.
Step 6: Create pull request and check if the SonarQube™ analysis is included
Create a new branch and add a commit with some issues in it. Create a pull request from that branch.
Your SonarQube™ Analysis Configuration should pick up the new pull request and analyze it correctly.
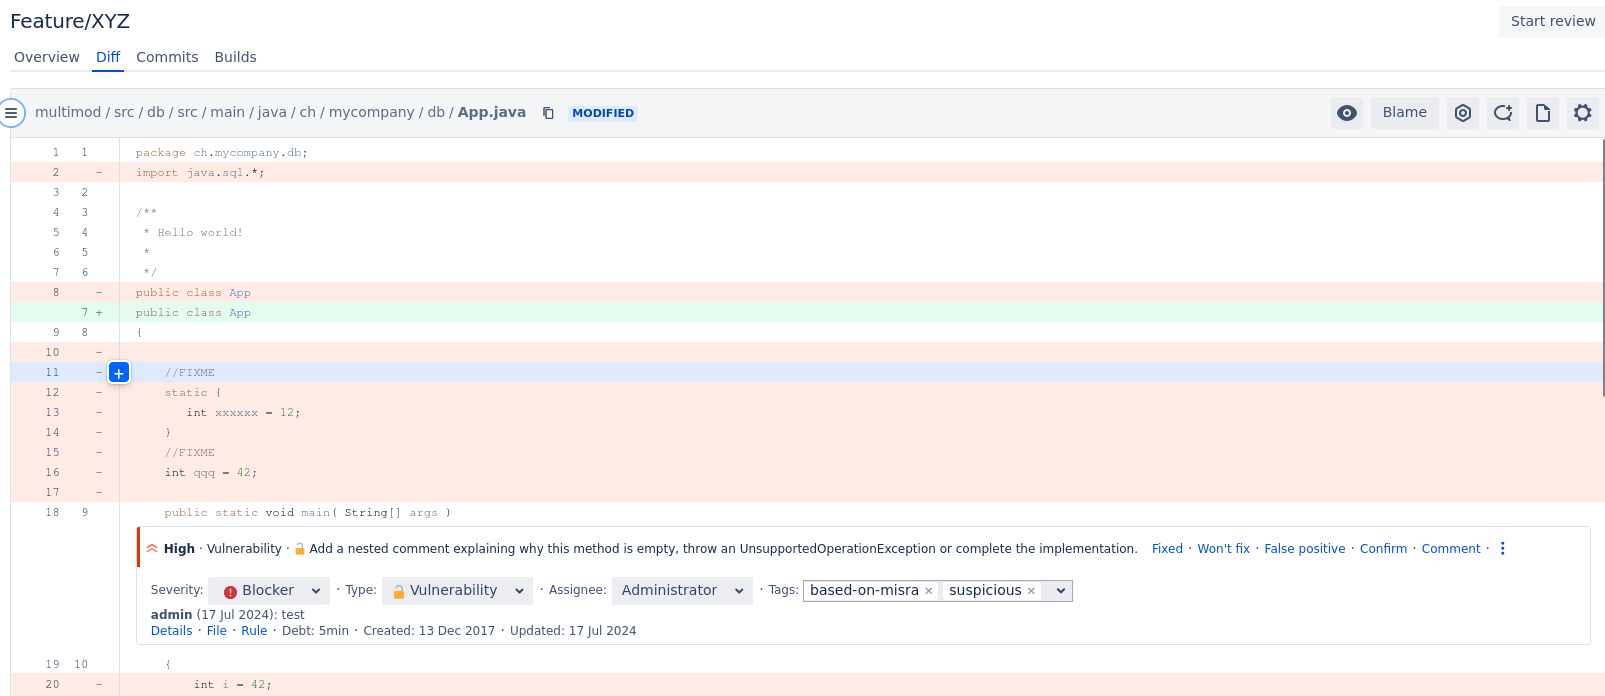
If you cannot see SonarQube™ issues or test coverage in here, please follow our configuration checklist to find out what went wrong.
SONAR™, SONARQUBE™ and SONARCLOUD™ are independent and trademarked products and services of SonarSource SA: see http://sonarsource.com , http://sonarqube.org , http://sonarcloud.io .