
Please note that each user can only view the content they have access to in SharePoint.
(See also What if a user doesn't have access to the SharePoint Document configured for a Confluence Macro?)
Adding a SharePoint document
There are two methods to add a SharePoint document using this macro. You can either use the macro browser to select the macro and search for a document, or simply copy the URL of a document and paste it into a Confluence page in edit mode.
Using the Macro Browser
To embed a document from SharePoint into a Confluence page, open the macro browser and select the "SharePoint Online Document" macro. You can use the search field to filter the macros by typing their name.

Image 1: Open macro browser (click to enlarge)
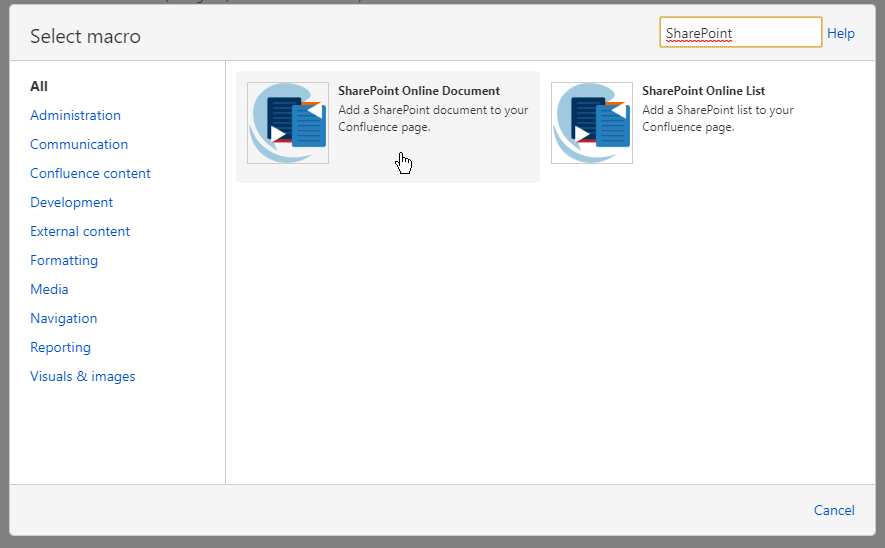
Image 2: Search for 'SharePoint Online Document' (click to enlarge)
Using URL Pasting
A quicker method to embed a document into a Confluence page is by copying the link of a SharePoint document and pasting it at the desired location on the page while in edit mode. A macro will be created automatically.
Once you publish the page, the document will be displayed. You can edit this macro later if you need to make changes. Additionally, you can adjust the display options before publishing the page. By default, the document will be embedded with the "responsive" display option preselected.
The following links are currently supported by this feature (for OneDrive and SharePoint):
-
Open the document in the web app and copy the link from the browser's address bar.
-
Open the document's context menu and select 'Copy link'.
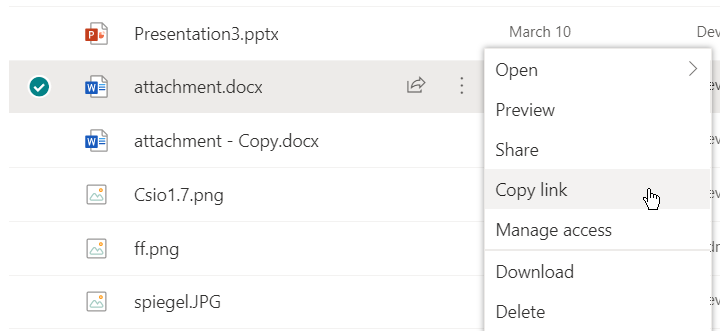
Image 3: Copying a document URL via the context menu and 'Copy link' (click to enlarge)
-
Open the document's context menu, select 'Share', and then choose 'Copy Link' in the subsequent dialog. Note that adding special permissions via the sharing link is currently not supported.

Image 4: Copying a document URL via the context menu and 'Share' (part one) (click to enlarge)
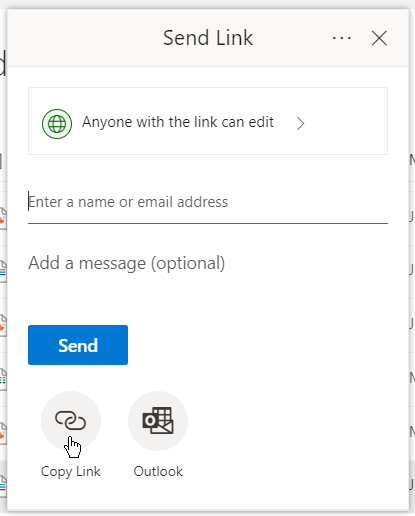
Image 5: Copying a document URL via the context menu and 'Share' (part two) (click to enlarge)
Configure the Document macro
Our aim is to make it as simple and efficient as possible for you to access the right items from Microsoft 365. Therefore, we offer multiple ways to locate your files, allowing you to choose the one that best suits your needs.
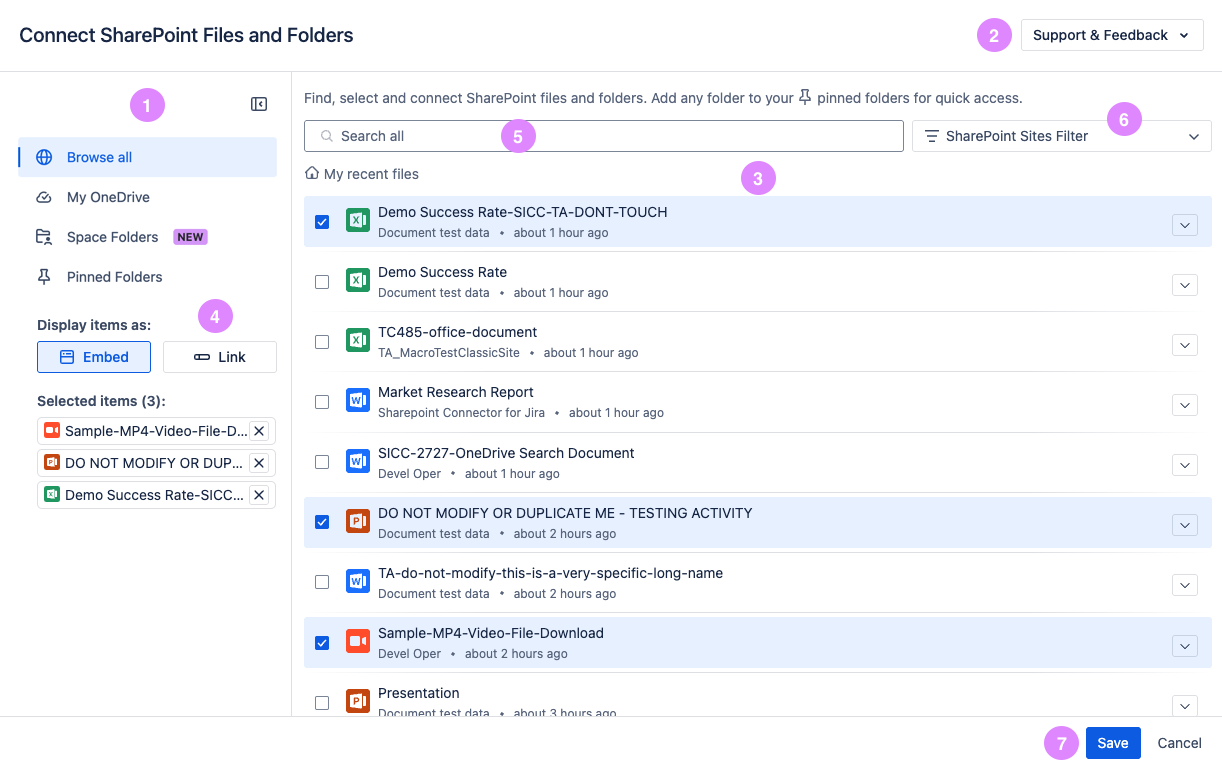
1. Navigation
You can use this section to navigate to different sections of the app.
-
Browse All: When navigating to this section, you will find your recent files from SharePoint. You can then use the search bar to search files and folders. You can also use the filter to refine your search.
-
My OneDrive: This section will display the files and folders of your personal OneDrive
-
Space Folders: This section will display the configured space folders from the space apps. Read more here.
-
Pinned Folders: This section lets you explore the folders that you previously pinned. Read more here.
2. Support & Feedback
By clicking this button, you will open the Support and Feedback menu. You can read more about this here.
3. Files and Folders
This section will display the files and folders in SharePoint.
In order to see a document in the list, the logged-in user must have at least read access to both the document and the SharePoint Online site collection.
You can see the preview of a file by clicking on the arrow on the right side of it.
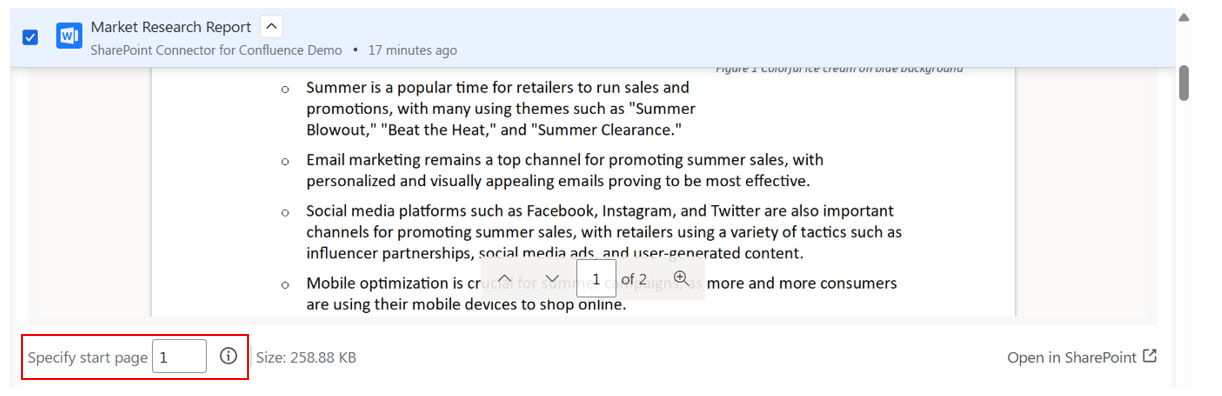
For page-based documents (Word, PowerPoint, PDF), you can specify which page should be displayed first when the document is embedded in Confluence.
When you expand the document preview in the editor, an additional option appears that allows you to select a start page. The option is disabled by default and becomes enabled once you select the document. The expanded view displays a live preview of the document instead of just a thumbnail, making it easier to navigate and choose the correct page.
Once you've selected your desired start page and saved the macro, the document will automatically open to that specific page when viewers see it on the Confluence page.
If you're editing an already embedded document and want to change the start page, please note that the document may not appear immediately in the "My Recent Files" results. In this case, use the search function to find your document, then expand the preview to adjust the start page setting.
Password-protected documents
Previews for documents protected with a password are currently not supported.
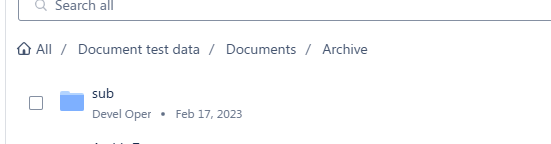
By clicking on a folder, you can navigate inside. You can also use the breadcrumbs to navigate back. Clicking on the home button will send you back to the initial content of the section.
To connect documents or folders in the page, you can click on it or use the checkbox on the left side.
4. Options section
The items you have selected will be displayed under “Selected items”. By clicking on the item, a preview pop up of the file will be shown. You can also remove selected files by clicking on the X button.
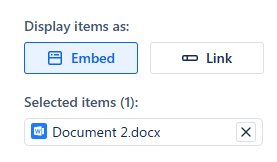
You can also choose how to display the items, by default, items will be shown as an embed, but you can also choose to display them as links on the Confluence page.
-
Link provides a persistent link, even if the document has been renamed or moved. By clicking this link, the document will be opened in the Office Web App in a new browser tab. Documents that are not supported by the Office Web App will trigger the default browser behavior if clicked.
Image 11: Document link preview (click to enlarge)
-
You can also select multiple links, which will be displayed as a list within a single macro. You can perform the same actions on these links as you would with embedded documents.
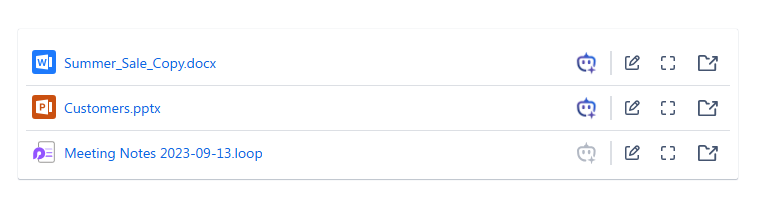
Image 12: Multiple file links (click to enlarge)
-
-
Alternatively, the Embed display option will render the item to appear as a preview on the page, so you can see the content of the document or folder inside of confluence. This view works on most of the common file types. To get more details on which types are supported, have a look at the official Microsoft documentation.
The document will fill the available space based on the layout of the Confluence page.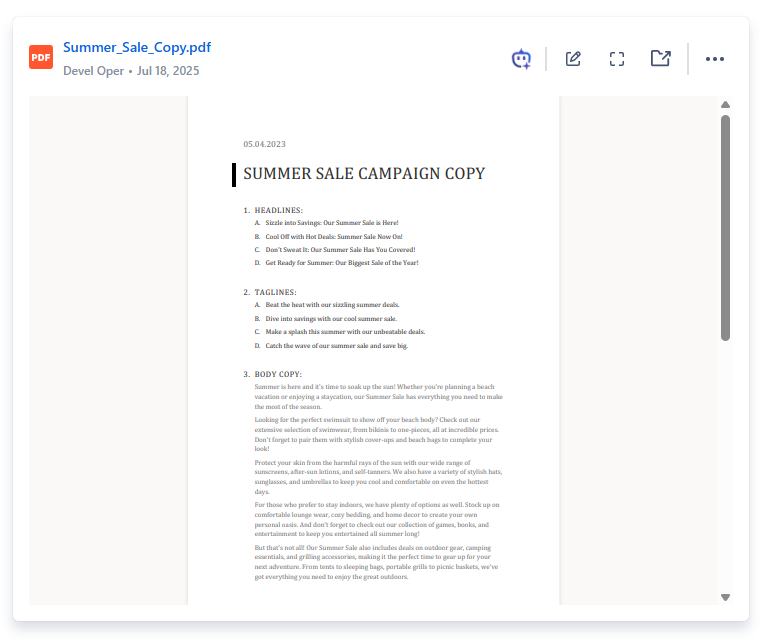
Image 13: Single Document Embed (click to enlarge)
-
You can embed multiple files within the same macro. A carousel of files will be displayed, and you can use the arrows or dots to navigate through the files.
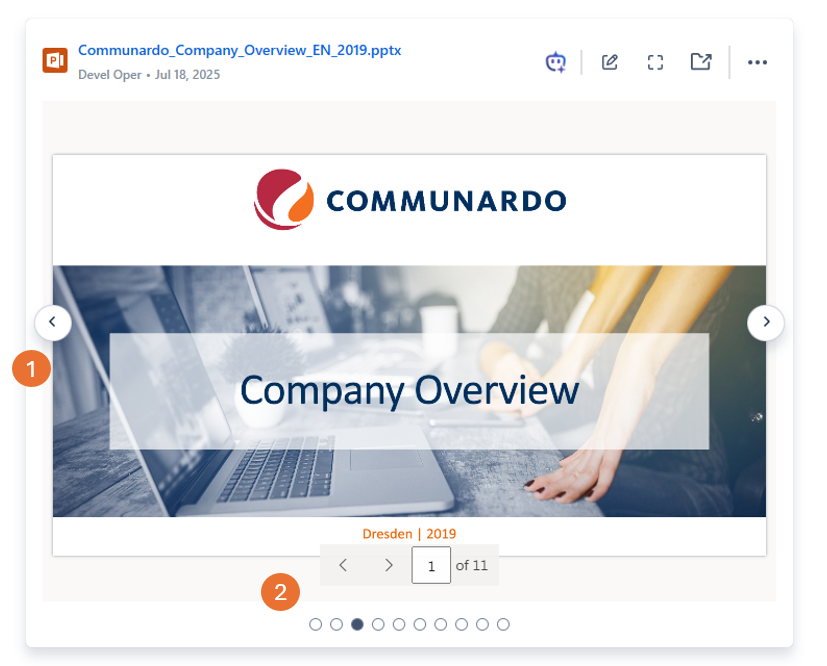
Image 14: Single Document Embed (click to enlarge)
-
5. Search
You can use the search bar to search for elements, depending on which section you are displaying.
-
In Browse All, a global search will be performed through your whole SharePoint. You can also use Filter to refine the search, as detailed in the next section.
-
The search will be performed either globally or based on the site and document library you have filtered for.
-
-
Similarly, if you are in the My OneDrive section, it will search inside your OneDrive content.
-
In case you have navigated in a folder then the search results will be limited to that folder.
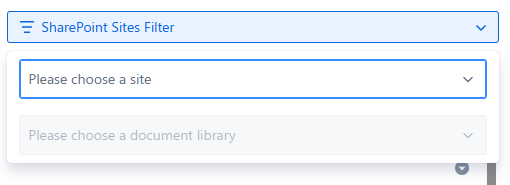
6. SharePoint Filters
In the Browse All section, you can refine your search by selecting a site and a document library
-
The document library filter will contain all the libraries of the previously selected site
-
When selecting a site the search will be performed throughout all the document libraries of that site.
-
If a document library is selected then the search will be limited to the content of that library
7. Saving
Once you have finished selecting items, you can connect all selected items to the page by clicking the Save button
Space Folders
This tab will display all configured space folders as selectable sources.
If no Space Folder is configured, you will see an informational message explaining that no Space Folders are available. This message also includes a link to the Space Apps – SharePoint Folders settings and a link to the relevant documentation.
If Space Folders are configured:
-
All available folders you have access to will appear as selectable and pinnable sources.
-
You can filter folders using the search bar at the top of the dialog.
-
When navigating inside a folder, you can search within that folder’s contents.
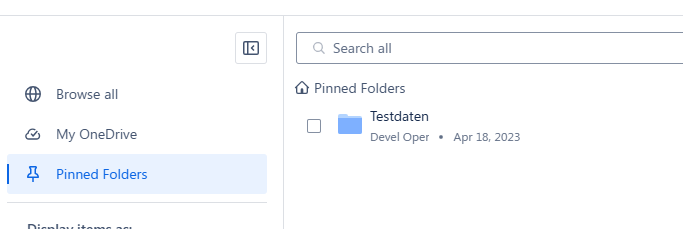
Pinned Folders
Once you navigate inside a folder, you will see the option to pin it.

Pinned folders will be stored in your user preferences and will be displayed in the section on the left side of the Document Macro editor.
They are used to easily access folders that you use frequently. You can search and connect items within the pinned folders.
Edit macro
If you edit an already inserted document macro, you will see the currently configured item in the preview section on the right side of the editor. It will be shown in the currently saved display option (link or embed). You can change the display option for the configured document and click 'Save'
If you need to change the currently configured document, search for a new document on the left side (select a new site first if needed), select it, and click 'Save'. For more help, see Configure Document macro.
Document Actions
You can perform actions on the embedded files or within the multiple links list. By clicking on the item name, you can open it in a new tab.
-20250718-111238.png?cb=87d18b6ee2a4c1109470ad98f62bdfa8)

-
Open AI: this action will open a popup dialog where you can ask questions related to the document. Read more here.
-
Edit in SharePoint: this action will open the document directly in SharePoint in a new tab.
-
Full screen: this action will open a full screen popup of your file.
-
Open parent Folder: this action will open a new tab and navigate you to the folder in SharePoint where the embedded file is stored.
-
Support & Feedback: by clicking this button, you will open the Support and Feedback menu. You can read more about this here.
Quick Switch Feature: Embed View and Link View
When the Confluence page is in either edit or live edit mode, the document macro includes two additional action buttons as part of the Quick Switch feature: Embed View and Link View.
-20250718-112643.png?cb=c2ee6ee923efeb5541b7300cd1241be1)
-20250718-113039.png?cb=d590c729bb119d73b015cbd284002f3f)
-20250718-113322.png?cb=23fd9777682f6a9d2d15a61940bab300)
-
Embed View: Instantly switch the macro to embed mode directly from this button.
-
Link View: Instantly switch the macro to link mode directly from this button.
Limitations
When an item is moved between two different SharePoint Document Libraries, it can no longer be displayed on the page.
This is due to a technical limitation related to permission inheritance and item re‑indexing across libraries.
However, moving an item within the same Document Library (for example, from one folder to another) continues to work as expected, and the item will still be displayed.
Example:
-
-